Lamp Woodworking Made Easy (Beginner’s Guide)
Are you ready to embark on a creative journey and craft your own lamp? This beginner-friendly guide is here to walk you through the process, making lamp woodworking accessible and enjoyable. Whether you’re new to woodworking or looking for a fresh project, this guide will help you get started with confidence.
Woodworking can seem intimidating, but with the right plan and tools, you can create something truly special. In this article, we’ll cover everything from selecting the perfect wood to mastering essential joint techniques like half-lap cuts and dovetail joints. You’ll learn how to assemble key parts, including the base, post, and lampshade supports, ensuring your lamp is both functional and visually appealing.
Our guide also delves into the use of specialized hardware kits and materials like mica and veneer, providing you with the insights needed to bring your project to life. With step-by-step instructions, real photos, and detailed descriptions, you’ll have all the resources necessary to create a stunning lamp that reflects your personal style.
So, why wait? Let’s dive in and get started on your lamp woodworking project today!
Table of Contents
Key Takeaways
- Learn how to create a beautiful lamp with detailed woodworking techniques.
- Discover the essential tools and materials needed for your project.
- Master joint techniques like half-lap cuts and dovetail joints.
- Follow step-by-step instructions with real photos and descriptions.
- Explore the use of specialized hardware kits and materials like mica and veneer.
Planning and Preparation for Your Lamp Project
Planning is the first step to a successful woodworking project. Before you even pick up your tools, take the time to map out every detail. This ensures your lamp turns out exactly as you envision it.
Selecting the Right Wood and Materials
Choosing the right wood is crucial. Consider the style you’re aiming for—whether it’s modern or traditional. Woods like pine offer a lighter look, while mahogany provides a richer, darker tone. Make sure your materials list includes everything from stock sizes for the post to veneer sheets for the shade. Having everything ready simplifies the process and helps you stay organized.
Gathering Essential Tools and Safety Tips
A well-stocked shop is key to a smooth project. Essential tools include a table saw for precise cuts and a drill press for accurate holes. Don’t forget safety gear like safety glasses. A well-prepared shop leads to better craftsmanship and fewer errors.
A well-planned project is a recipe for success.
With a clear plan and all materials at hand, you’re set to create a lamp that’s both functional and beautiful. Proper preparation is the foundation of a successful woodworking project.
Lamp Woodworking: Essential Tools, Materials, and Techniques
Creating a beautiful lamp involves more than just wood and glue. The right tools and materials are essential to bring your project to life. Whether you’re a seasoned woodworker or just starting out, understanding the basics will help you craft a stunning piece.
Understanding the Hardware Kit and Material List
A hardware kit is the backbone of your lamp. It typically includes screws, brackets, and other fasteners. Your material list should detail every part, from the wood for the base and post to the veneer for the shade. Having everything laid out ensures nothing is missed, making assembly smoother.

Shop Setup and Essential Techniques for Precise Cuts
A well-organized shop is key to success. Use an auxiliary fence on your table saw for straight cuts and a router with a dovetail bit for precise joints. These tools help you achieve professional results without compromising on quality.
Incorporating Mica and Veneer for a Sophisticated Look
Add elegance with mica panels and veneer. Mica offers a warm glow, while veneer adds a polished finish. These details elevate your lamp from simple to sophisticated, ensuring it stands out in any room.
Step-by-Step Guide to Crafting Your Table Lamp
Now that you’ve gathered your materials and tools, it’s time to bring your table lamp to life. This step-by-step guide will walk you through the process, ensuring every piece fits together perfectly. Let’s start with the foundation of your lamp—the base and post.
Assembling the Base, Post, and Lampshade Supports
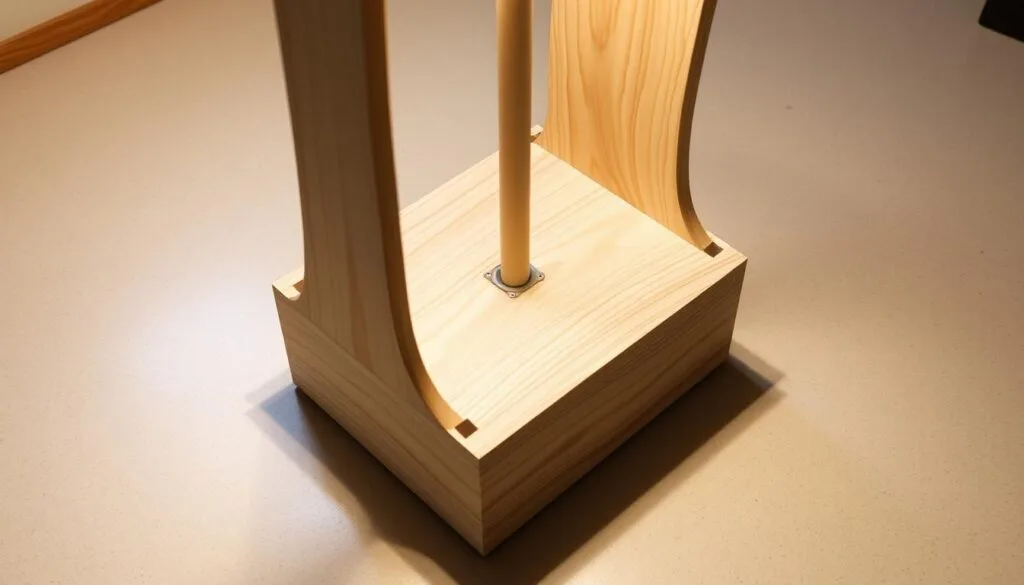
Begin by aligning the base and post. Use detailed measurements to ensure they match up seamlessly. Dry-fit the components first to check the alignment. Once satisfied, apply glue and clamp them firmly. This step requires patience, as proper alignment is crucial for stability.

Next, focus on the lampshade supports. These are attached to the post using dovetail joints. Precision is key here, so take your time to ensure a flush fit. Use a router with a dovetail bit for clean cuts and test the joints with trial cuts before gluing.
Forming and Fitting the Dovetail Joints
Dovetail joints provide strength and a polished look. Start by marking the post where the supports will attach. Use a router with a 1/2″×14° dovetail bit to create the joints. After cutting, dry-fit the supports to ensure a snug fit. If needed, adjust the tenon lengths for a perfect match.
Patience and precision are your best tools in this step.
Once everything fits, apply glue and clamp the pieces together. Use feather boards to keep the wood stable during the process. Let the glue dry completely before moving on. With these steps, your lamp will be sturdy and visually appealing.
Conclusion
Creating a table lamp is a rewarding project that combines technical skills with creative design. From preparing the base and post to crafting precise joints, each step requires attention to detail. Remember, taking your time ensures a polished finish and a sturdy structure.
Your finished lamp is more than just a functional piece—it’s a reflection of your skill and style. The use of materials like mica and veneer adds elegance, making it a standout piece in any room. Whether you’re a beginner or experienced, this project is achievable with the right guidance.
Now that you’ve got the knowledge, it’s time to get started! Use the detailed instructions on this page as your guide. Once your project is complete, consider sharing a photo in woodworking magazines or online print features. Join a community of makers and showcase your craftsmanship.
This blend of learning and creating makes the journey as valuable as the final piece. Enjoy the process, and don’t hesitate to reach out for support along the way. Happy building!
FAQ
What materials do I need for this project?
You’ll need a list of materials like wood for the base and post, a hardware kit for the joint and edge details, and a shade to complete the table lamp. Make sure to check the material list provided in the plan for exact measurements and quantities.
How much time will it take to complete the project?
The time depends on your skill level and the design complexity. On average, it can take about 10-15 hours, spread over a few days, to ensure each part is crafted properly and fits seamlessly.
What tools are essential for this woodworking project?
Essential tools include a table saw for cutting wood, a drill press for precise joints, and sanding equipment for smoothing edges. Safety gear like gloves and goggles is also a must-have in your shop.
Can I customize the design of my table lamp?
Absolutely! You can customize the design by choosing different types of wood, adding a unique shade, or modifying the base to match your style. The key is to stick to the material list and plan while adding your personal touch.
How do I ensure the joints are strong and sturdy?
Use dovetail joints for strength and durability. Make sure to follow the steps carefully and test the fit before final assembly. Clamps and glue will help secure the parts while the joint sets.
Where can I find a detailed material list and step-by-step instructions?
You can find the material list and instructions in the project plan provided. Additional tips and photos are available in the magazine or on the product page for reference.
What if I make a mistake while cutting the wood?
Mistakes happen! If you cut a piece incorrectly, don’t worry. You can either start over with a new piece of wood or adjust the design to work with the cut you have. It’s all part of the learning process.
How do I avoid splinters when working with wood?
Always sand the edges and surfaces thoroughly after cutting. Wearing gloves can also help protect your hands from splinters while handling the wood.
Can I use a hand saw instead of a table saw for cutting wood?
Yes, you can use a hand saw, but it may take more time and effort to get precise cuts. A table saw is recommended for accuracy, especially for intricate designs and joints.
How do I ensure the lampshade fits properly on the base?
Measure the diameter of the shade and the opening on the base carefully. Make sure the joint where they connect is secure and even. You can also test the fit before final assembly to make adjustments.
What kind of finish should I use to protect the wood?
Use a water-based or oil-based polyurethane to protect the wood and enhance the grain. Apply it evenly and let it dry completely between coats for a durable finish.
Can I add a photo or artwork to the lampshade?
Yes! You can decoupage a photo or artwork onto the shade using a sealant like Mod Podge. Just make sure the design is dry and fully sealed before using the lamp.
How do I prevent the lamp from tipping over?
Ensure the base is heavy enough or weighted to provide stability. You can add weights or use a wider base design to keep the lamp steady on any floor or table top.
What if I don’t have all the tools listed in the plan?
You can start with the basic tools and gradually add more as you progress. Many hardware stores offer rentals or alternatives if you don’t have a specific tool on hand.
How do I get started if I’m new to woodworking?
Start by gathering your materials and tools, then follow the step-by-step guide. Take your time with each part, and don’t hesitate to ask for help or watch tutorials if you’re unsure about a technique.

