Do It Yourself Table Saw: Build a Custom Woodworking Station
Building your own table saw workbench is a great way to get creative and efficient. It doesn’t matter if you’re new to woodworking or have lots of experience. A do it yourself table saw can help you save money and fit your specific needs.
With a diy table saw workbench, you can design a tool that perfectly matches your space and requirements. Imagine cutting materials with precision using a machine you built yourself.
Table of Contents
Key Takeaways
- Create a tailored woodworking solution with a diy table saw workbench.
- Save money while gaining control over every aspect of your tool’s design.
- Projects can start simple and grow with your skills and workshop space.
- Learn how to convert existing tools like circular saws into functional stations.
- Master a skill that improves both your craftsmanship and workshop organization.
Why Build Your Own DIY Table Saw Station
Building your own table saw station lets you tailor it to your needs. It’s a way to control your budget, design, and space better than commercial models. A homemade table saw workbench gives you more control over these aspects.
Cost Benefits of a Homemade Table Saw
- Save 50-70% by using affordable materials like MDF, casters, and adjustable legs
- Average DIY cost: $200-$300 vs. $1,000+ for prebuilt units
- No hidden fees for shipping or assembly
Customization Possibilities for Your Specific Needs
Design your station to fit unique requirements:
- Raise/lower the work surface to match your height
- Add built-in storage bins for tools and offcuts
- Mount LED lights for better visibility
Space-Saving Solutions for Small Workshops
| Feature | Table Saw Workbench | Commercial Alternatives |
|---|---|---|
| Space usage | Foldable designs, wall-mounted options | Fixed size, limited mobility |
| Adjustability | Sliding tables, extendable legs | Rigid frame structures |
| Storage | Integrated compartments under the table | No built-in storage solutions |
DIY builders save 40% more space than standard setups. Whether you’re a small-space woodworker or a weekend hobbyist, customizing your table saw workbench ensures every inch works for you.
Benefits of a Custom Table Saw Workbench
Creating a table saw workbench just for you brings big benefits. It ensures your cuts are always precise. A stable setup keeps your saw steady, avoiding mistakes.
Features like dust ports and extensions save time and space. Imagine a diy table saw workbench with spots for blades and clamps. This keeps your tools handy.
- Accuracy: Solid mounting points prevent blade movement during use.
- Efficiency: Add rollout trays or side shelves to organize materials.
- Safety: Adjustable heights match your stance, reducing back strain.
Think about how you work. A table saw workbench can have a dust collection port. This connects to vacs like Shop-Vac or Craftsman. Raising the bench to 34-36 inches helps with long projects.
Use Baltic birch plywood for a smooth, durable surface.
“My custom bench cut my setup time by half. The built-in miter gauge slots made angled cuts a breeze.” –木材工人, DIY Workshop Blog
Whether you need a small bench for a garage or a big setup, a diy table saw workbench fits your needs. Make it safe with lag bolts and anti-slip feet. Every detail, from blade guards to lights, makes your workspace better.
Planning Your Do It Yourself Table Saw Project
Starting your DIY table saw project needs careful planning. This part covers important steps to make sure your plans match your goals and skills. Follow these tips to avoid common mistakes:
Assessing Your Workspace Requirements
First, measure your workshop’s size. Check the ceiling height for tool placement and find power outlets. Make sure there’s room for material storage and moving around your DIY table saw workbench. Here’s a checklist:
- Floor space (at least 6×4 feet)
- Ceiling clearance for blade height adjustments
- Proximity to ventilation and lighting
Creating Detailed Measurements and Drawings
Start with rough sketches on graph paper or digital tools like SketchUp. Mark important dimensions:
- Table surface length and width
- Motor housing depth
- Rip fence alignment points
Use a T-square and protractor to check angles for accuracy.
Setting a Budget for Your DIY Project
First, list the main parts: motor, blade, and framing materials. Compare prices at Home Depot and online. Plan for:
- High-quality steel for base framing
- Adjustable outfeed tables
- Safety guards
Save 15% of your budget for unexpected costs.
Determining the Complexity Level for Your Skills
Beginners should start with simple designs like fixed-angle models. More experienced builders can try features like:
- Motorized blade elevation
- Computer numerical control (CNC) integration
- Automatic dust collection systems
Check your comfort with tools like a router or miter saw before choosing complexity.
Essential Materials and Tools for Your Project
Getting the right materials and tools is key for a smooth table saw workbench build. Make a list of everything you need before starting. This way, you can avoid any delays. Here’s what you’ll need:
- Plywood or MDF (for the base and table top)
- Metal or wooden framing for stability
- Fasteners: bolts, screws, and clamps
- Electrical components (if adding a motorized base)
- Safety gear like gloves and goggles
Plywood is affordable and sturdy, while MDF resists warping but might be pricier. Solid wood is durable but can be more expensive. Pick what fits your table saw workbench design best. If you’re turning a circular saw to table saw, focus on strong brackets and a stable base for the motor.

You’ll need a circular saw, drill, tape measure, and level. A jigsaw or router can help with custom touches. For a handheld circular saw conversion, get a vise grip or clamps for precise placement. Always check if the hardware fits your power tool.
Home Depot or Lowe’s have affordable options, while Amazon has specialty parts. Make sure to double-check the quantities to avoid last-minute trips to the store. Good preparation saves time later.
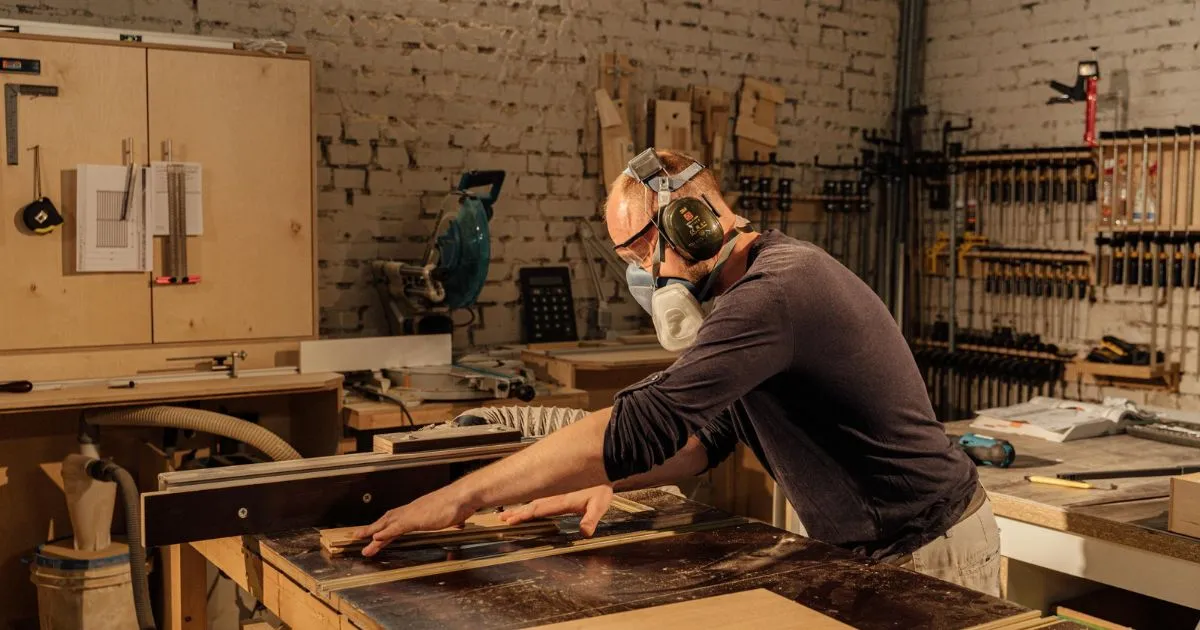
Safety Considerations Before Starting Construction
Starting a do it yourself table saw means putting safety first. Whether you’re turning a circular saw into a table saw or building a custom workstation, safety is key. Here are some steps to help you stay safe.
Personal Protective Equipment Essentials
| Item | Why It Matters |
|---|---|
| Safety goggles | Blocks wood chips and dust from eyes |
| Respirator masks | Filters airborne particles like sawdust |
| Steel-toe boots | Shield feet from dropped tools or debris |
Electrical Safety Protocols
- Use grounded power cords rated for your tool’s amperage
- Install GFCI outlets to prevent electrocution risks
- Avoid extension cords longer than 25 feet
Emergency Stop Systems
Adding a how to make a table saw with a circular saw safety feature like a red emergency button is crucial. It stops the blade instantly. Place it on the work surface opposite the blade for quick access in emergencies.
“A moment’s oversight can lead to lifelong consequences.”
Remember: Proper grounding and PPE are as vital as the tools themselves. Safety isn’t optional when working with power tools.
Step-by-Step Guide to Building Your Table Saw Workbench
Start by building the table saw workbench base. Use 2×4 or 2×6 lumber for the frame. Cut four legs and two cross braces to your preferred height. Screw them together, then add diagonal braces for rigidity.

- Build the base frame first. Check for square by measuring diagonals between opposite corners. Adjust until measurements match.
- Attach the work surface. Use ¾-inch plywood or hardwood planks. Apply wood glue and screws for a rigid connection. Sand the top smooth to ensure accuracy.
- Mount your saw using the manufacturer’s instructions. Use metal L-brackets to secure the saw base to the workbench. Leave clearance for blade guards and dust collection ports.
- Add fence systems next. Attach a 1×4 board with T-nuts for sliding adjustments. Test alignment with a framing square before final fastening.
- Install miter slots and outfeed tables. Use pre-drilled brackets for the miter gauge track. Build a separate outfeed table to support long boards during cuts.
| Step | Key Action |
|---|---|
| Base Assembly | Ensure square corners with 3-4-5 triangle method |
| Saw Mounting | Use ½-inch lag bolts for secure attachment |
| Fence Setup | Attach adjustable rails with machine screws |
| Testing | Cut scrap wood to check for wobble or warping |
Test each component before final assembly. Double-check blade alignment and fence parallelism. Once complete, your diy table saw workbench will handle precise cuts and heavy use. Store extra tools in under-table compartments for easy access.
How to Make a Table Saw with a Circular Saw
Turn your circular saw into a table saw with some planning and the right steps. This guide shows you how to make a circular saw to table saw setup for precise projects.
| Mounting Method | Pros | Cons |
|---|---|---|
| Slide-On Plate | Quick attachment, budget-friendly | Limited tilt adjustments |
| Adjustable Bracket | Height/angle adjustments, durable | Requires more assembly time |
| Clamp-On System | Universal fit for most circular saws | Potential vibration during use |
First, pick a circular saw to table saw conversion that fits your needs. Look for a saw with at least 15 amps and a blade guard for safety. Mount the saw to a strong base using clamps or a bracket. Align the blade by marking its height on the table to avoid drift during cuts.
- Test blade alignment by drawing a line across the table surface.
- Loosen the motor base and adjust until the blade aligns perfectly with your mark.
- Test cuts on scrap wood before starting projects to confirm accuracy.
“My first conversion used a sliding plate mount—it simplified setup but needed extra clamps for stability.”
Always check fence alignment with a combination square. Regularly sharpen the blade and check the belt tension to extend tool life. With these steps, your how to make a table saw with a circular saw project will be a reliable addition to your workshop.
Adding Features to Enhance Your DIY Table Saw
After you’ve built your do it yourself table saw, you can make it better with smart upgrades. First, add a dust collection system to catch sawdust right where it happens. Connect a flexible hose to your saw’s blade guard and link it to a vacuum or dust collector. This makes your workspace cleaner and safer to breathe.
- Storage Solutions: Put up magnetic strips for clamps or drawers for blades and push sticks. A pegboard wall mount above your diy table saw workbench keeps tools handy.
- Mobility Options: Add casters with locks for easy moving. Use heavy-duty wheels from Rockler or Lee Valley for stability.
- Extension Tables: Make an L-shaped extension with a hinged leaf for big panels. Use 3/4” MDF for a strong, stable surface.
“A well-designed workbench is the difference between a tool and a system,” says木工专家琳达· .
Install an adjustable fence system for angled cuts using a sliding T-track. Laser-guided arms from Kreg Tools help with precision. For repetitive tasks, make pre-drilled stop blocks for consistent lengths. Start with safety upgrades first, then add decorative touches.
Maintenance Tips to Keep Your Homemade Table Saw Running Smoothly
Keeping your do it yourself table saw in good condition is crucial. Simple steps can prevent expensive repairs and ensure safety.
| Task | Frequency | Description |
|---|---|---|
| Clean dust buildup | After each use | Use a soft brush and vacuum to remove debris from motor vents and blade guards. |
| Blade inspection | Weekly | Check for nicks using a light test. Dull teeth mean it’s time to sharpen or replace. |
| Lubrication points | Monthly | Apply silicone spray to sliding rails and pivot points as per manufacturer specs. |
| Full system check | Annually | Inspect belts, bearings, and electrical connections for wear. |
Regular Cleaning Procedures
- Unplug the tool before cleaning
- Use a vacuum with HEPA filter for fine dust
- Wipe down the miter gauge and fence for smooth movement
Blade Maintenance and Replacement
Store spare blades in a dry area. When sharpening, use a honing guide to maintain proper bevel angles. Replace carbide-tipped blades every 6 months for optimal cuts.
Troubleshooting Common Issues
If your circular saw to table saw setup vibrates excessively, check the arbor bolt tightness. For binding blades, inspect the throat plate opening alignment. Always verify alignment using a combination square.
Maintaining your custom tool takes just 15 minutes weekly. Follow this schedule and you’ll avoid 80% of typical failures. Keep a toolkit nearby with Allen wrenches and a multimeter for quick checks.
Conclusion: Enjoying the Rewards of Your Custom Woodworking Station
Building your own table saw has changed your woodworking game. Your table saw workbench is more than a tool; it’s a creative base. Every step, from planning to assembly, has sharpened your skills for other projects.
Start with simple tasks like cutting pieces for shelves or frames. These projects boost your confidence and get you used to your setup.
Your table saw workbench is the heart of your workshop. Add a miter saw stand or storage for tools. Check out Rockler or Woodcraft for accessories. Share your progress online by posting photos and tips for others.
Every improvement keeps your skills sharp and your setup perfect for your needs. Your homemade tool is built to last. Whether you tweak the base or add dust collection, you’re not stuck with store-bought solutions.
This project shows how a custom table saw workbench unlocks endless possibilities. As you take on bigger projects, remember the skills you’ve gained. You can always adapt your tool when new ideas come.
FAQ
What are the main benefits of building my own DIY table saw workbench?
Making your own table saw workbench lets you tailor it to your needs. It boosts your cutting precision and accuracy. Plus, it’s cheaper than buying one, and you can fit it perfectly in your space.
Can I convert my circular saw into a table saw?
Yes, you can turn a circular saw into a table saw. It’s a cost-effective way to use tools you might already have. Just make sure to mount and align it correctly for safe and precise cuts.
What materials do I need for a DIY table saw workbench?
You’ll need good lumber like plywood or MDF, and hardware like screws and bolts. Don’t forget electrical parts and storage solutions if you want them. Adding dust collection features helps keep your workspace clean.
How do I ensure safety while working on my DIY project?
Always wear safety gear like glasses and ear protection. Follow electrical safety rules. Also, include safety features like emergency stops and blade guards in your design.
What features can I add to enhance my DIY table saw station?
Think about adding dust collection systems and storage for tools. Adjustable fences and mobility options can also make your workspace better. These features help keep things organized and efficient.
How do I maintain my homemade table saw to keep it running smoothly?
Keeping it clean is key to avoiding dust and ensuring precise cuts. Regularly check and maintain your blades. Replace them when needed, and fix any issues like misalignment or vibration for the best performance.
How do I determine the complexity level for my DIY table saw project?
Look at your woodworking skills and experience. Start with a simple design if you’re new to it. As you get better, you can tackle more complex projects. This approach helps you succeed without feeling overwhelmed.
Where can I find affordable materials and tools for my project?
Check local hardware stores, home improvement centers, and online for deals. Visit secondhand shops, auctions, or community sales for cheaper options. These places can help you save money on your project.