DIY Wood Coasters: Creative Crafting Ideas
Welcome to the exciting world of DIY wood coasters! In this article, you’ll learn about creative crafting ideas. These ideas will help you make coasters that are both functional and add a personal touch to your home. Crafting your own coasters lets you explore your creativity and create custom pieces that show off your unique style.
Whether you’re looking to enhance your home or find personalized gifts, this guide has you covered. It provides all the essential materials and techniques you need to start making your own coasters.
Table of Contents
Key Takeaways
- Explore the benefits of creating your own diy wood coasters.
- Learn about the essential materials and tools needed.
- Discover step-by-step guidance on how to make coasters.
- Unleash your creativity with unique design ideas.
- Find inspiration for themes and personal touches in your projects.
Introduction to DIY Wood Coasters
Making your own coasters is a fun way to add a personal touch to your home. It’s a mix of function and creativity. Plus, it helps protect your surfaces from water marks.
So, why make coasters? They’re practical and let you express your style. You can pick colors, designs, and materials that match your taste. It’s a chance to show off your unique flair.
Whether you’re crafty or just starting out, making wooden coasters is easy. You can choose from different woods and methods. This lets you create something that’s both useful and beautiful for your space.
Benefits of Crafting Your Own Coasters
Making your own coasters offers many benefits beyond just protecting surfaces. The benefits of DIY coasters include customization and saving money. It’s a fun and rewarding activity, perfect for personal use or as a gift.
Personalization and Creativity
When you create personalized coasters, you control the design and look. You can pick colors, styles, and materials that match your taste and home. Whether you like rustic or modern, the choices are endless.
Your unique touch makes simple coasters into meaningful pieces. They show off your personality and style.
Cost-Effective Solutions
Making your own coasters is also a smart money move. Many coasters sold in stores are pricey. But, cost-effective coasters can be made at home with affordable materials.
By using a few basic tools and supplies, you save money. Plus, you get to enjoy the satisfaction of making something yourself.
Materials Needed for DIY Wood Coasters
Making wood coasters needs the right materials for DIY wood coasters and tools. Knowing the types of wood for coasters affects the look and how long they last. Here’s info on wood choices and the tools to make coasters.
Types of Wood to Use
There are many types of wood for coasters, each with its own look and strength. Here are some favorites:
| Type of Wood | Visual Appearance | Durability | Cost |
|---|---|---|---|
| Pine | Light and rustic | Medium | Low |
| Oak | Grainy and classic | High | Medium |
| Birch | Smooth and elegant | Medium | Medium |
| Maple | Light with fine grain | High | Higher |
Essential Tools and Equipment
For making coasters, you need certain tools. Here’s what you’ll need:
- Saw (circular or jigsaw) for cutting wood
- Sander for smoothing edges
- Drill for adding decorative features
- Clamps to hold pieces in place
- Finishing supplies (stain, sealant) for protection
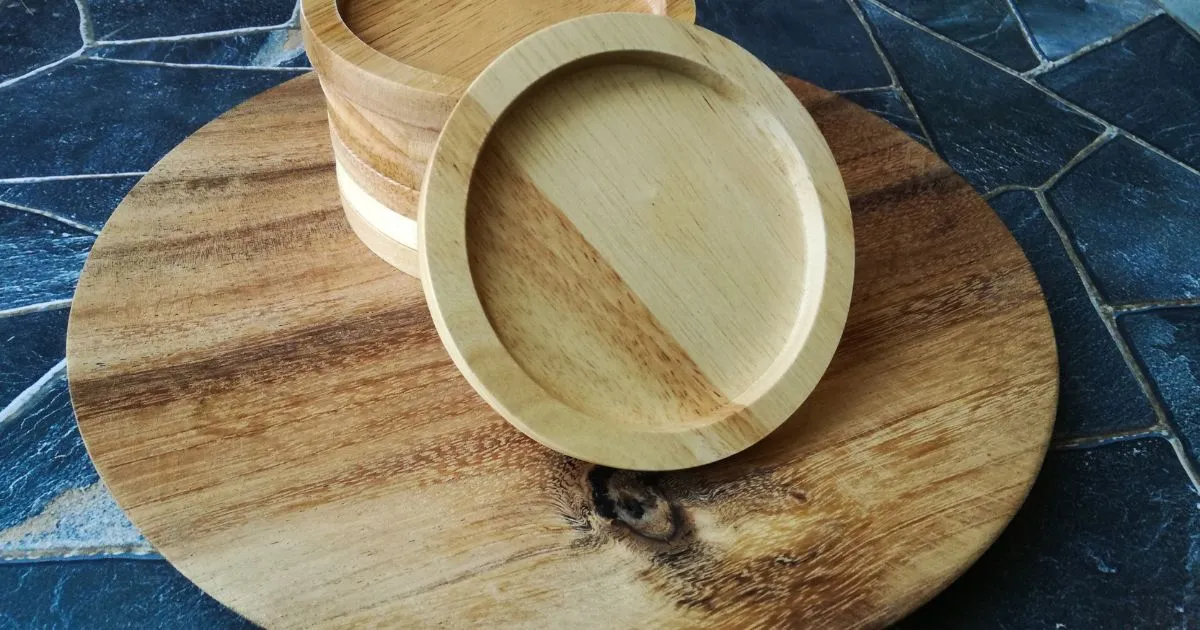
Step-by-Step Guide: How to Make Wooden Coasters
Making wooden coasters is a fun project that can make your home look better or be a special gift. This guide will show you how to make coasters, from starting with wood to adding the final touches.
Preparing Your Wood
First, pick the right wood. Birch, oak, and maple are good choices because they last long and look great. Clean the wood and measure your coaster size. This step is key to making each coaster look the same and nice.
Cutting Techniques
Next, cut the wood into squares or circles with a saw. Use a straight edge for accurate cuts. A miter saw can also help with sharp cuts. Make sure the thickness is the same for durability.
Sanding and Finishing
After cutting, sanding is crucial. Start with coarse sandpaper and move to finer grits. This makes your coasters smooth and nice. Finally, add a wood finish or sealer for protection and shine.
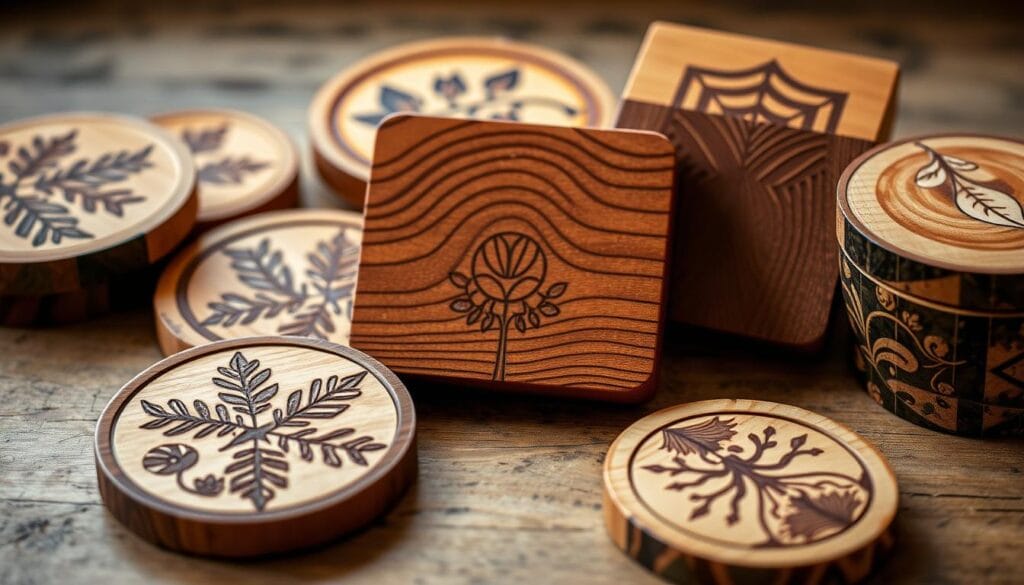
Creative Ideas for DIY Wood Coasters
Turn simple wood coasters into beautiful art with these creative ideas. You can use stencils or add vibrant resin inlays. Each method lets you show off your style and add to your home decor.
Stenciled Designs
Stenciling adds cool patterns and designs to your coasters. You can pick from many stencils or make your own. It’s a great way to get creative with colors and styles.
Use strong paints to keep your stenciled coasters looking good for a long time.
Resin Inlays
Resin inlays add elegance to your wood coasters. You pour colored resin into carved spaces, creating depth and a smooth look. Try mixing colors for unique effects.
The result is stunning and great for impressing friends and family.
Burnt Wood Techniques
Burnt wood techniques, or pyrography, give a rustic look that’s both trendy and classic. Burning designs into the wood creates a striking contrast. It’s easy to learn and lets you show off your creativity.
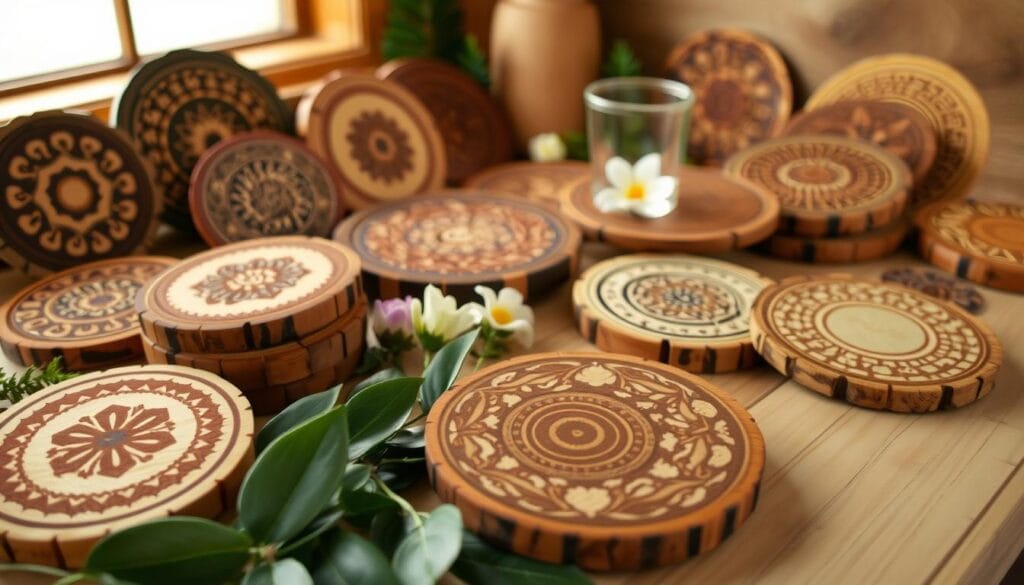
DIY Wood Coasters: Fun Themes to Explore
Creating personalized wood coasters is a fun way to get creative. You can make pieces that are both useful and beautiful. Try seasonal designs that change with the seasons or nature-themed coasters that celebrate the outdoors.
Seasonal Designs
Seasonal coaster designs add a festive touch to your home. Imagine coasters with autumn leaves, winter snowflakes, or spring flowers. These designs can make your gatherings feel cozy and welcoming.
Use paints or natural stains to match the season. This way, your coasters will always be in sync with the time of year.
Nature-Inspired Themes
Nature-themed wood coasters are perfect for outdoor lovers. Consider designs like mountain landscapes, floral patterns, or lush forests. You can use simple carving or prints to bring nature’s beauty to your coasters.
This not only beautifies your space but also starts interesting conversations about nature.
Customizing Your Coasters with Paint and Stains
Customizing wood coasters can make your home look better and show off your style. Choosing the right colors is key to matching your coasters with your decor. You can pick earthy tones for a natural look or bright colors for a bold statement.
Choosing the Right Colors
Think about your space’s theme when picking colors for your coasters. Neutral shades like beige and grey fit modern homes well. Bright colors can brighten up traditional rooms. Test colors on a small piece of wood first to see how they look.
This helps you pick the perfect colors that match your decor.
Application Techniques
Before painting your coasters, make sure to clean the surface well. This ensures the paint sticks. Use painter’s tape to protect areas you don’t want to paint.
There are many ways to paint, like using a sponge for texture or a brush for details. Let each coat dry fully before adding more. With these tips, making your own coasters can be a fun project.
Protecting Your DIY Coasters
Your DIY wood coasters need special care to stay in great shape. To keep them safe from spills, moisture, and wear, the right sealants are key. Knowing which ones work best can make your coasters last longer.
Sealants and Finishes
When picking sealants, look for ones that keep water out and last long. Here are some top choices:
| Sealant Type | Benefits | Ideal For |
|---|---|---|
| Polyurethane | Durable, scratch-resistant, waterproof | High-use coasters in busy households |
| Epoxy Resin | Creates a glossy finish, strong and durable | Artistic coasters with decorative designs |
| Natural Oils (e.g., Linseed) | Eco-friendly, enhances wood grain | Rustic or natural finish enthusiasts |
| Varnish | Weather-resistant, flexible finish | Outdoor coasters or less busy environments |
Caring for Your Wood Coasters
To keep your coasters looking good, follow these tips:
- Regular Cleaning: Use a damp cloth and mild soap. Don’t soak them in water.
- Reapply Sealant: Reapply every year if they show wear and tear.
- Avoid Direct Sunlight: Keep them away from direct sunlight to prevent fading.
- Use Coasters Under Hot Items: Place hot cups or dishes on coasters to avoid heat damage.
Using Coasters as Gifts
Turn your handmade coasters into special gifts for your friends and family. They are perfect because they are both useful and personal. This section will show you how to make each set unique, matching their style and preferences.
Personalized Gift Ideas
Think about adding personal touches to your coasters. You can engrave names, initials, or special dates on them. This makes the gift even more memorable. Here are some ideas:
- Make coasters for special occasions like weddings or anniversaries.
- Create a set that shows off their hobbies or interests, like travel or nature.
- Choose shapes or colors that match their favorite things.
Creative Gift Wrapping Tips
How you present your gift matters a lot. Creative wrapping can make your coasters even more special. Here are some tips to make your wrapping stand out:
- Use fabric wraps or burlap for a natural, handmade look.
- Add twine or dried flowers for a charming touch.
- Include customized tags or cards with a personal message or story.
Host a DIY Coaster-Making Party
Hosting a DIY coaster-making party is a great way to make memories. It lets friends and family get creative and make their own coasters. This makes for a fun time where everyone can share ideas and bond.
To make the event memorable, prepare all the supplies you need. Plan fun activities that everyone will enjoy. This way, your party will be a hit.
Organizing Your Supplies
Getting ready for a craft party is important. Start by gathering all the materials you need. Here’s a checklist to help you make sure you have everything:
| Supply | Purpose |
|---|---|
| Wood pieces | Base for coasters |
| Pens or markers | Design and decorate |
| Paints and brushes | Coloring options |
| Stencils | Design templates |
| Sealant or finish | Protect coasters |
Having these supplies ready lets everyone enjoy the coaster-making without any hitches.
Fun Activities and Themes
To make your DIY coaster-making party even better, add fun themes or activities. Here are some ideas to make your event special:
- Seasonal Themes: Use designs that match the season, like autumn leaves or summer flowers.
- Personalized Coasters: Have guests make coasters that show off their personality or interests.
- Game Station: Create a spot with different crafting tools for guests to try new things.
These creative touches can make your party unforgettable. It’s a chance for everyone to show off their unique coasters and have fun together!
Incorporating DIY Coasters into Home Decor
DIY wood coasters can make your home decor stand out. They show off your personal style and are both useful and decorative. By displaying them creatively, you can make your rooms look better and show off your skills.
Displaying Your Creations
Don’t just pile your coasters on the coffee table. Try using a decorative bowl to keep them organized. This keeps your space neat and makes it easy for guests to find a coaster. You could also frame your coasters in shadow boxes or on walls. This turns simple items into beautiful art.
Using Coasters in Different Rooms
Coasters can fit right into your home’s decor in each room. In the living room, match them with your furniture colors or use decorative trays. In the kitchen, choose coasters that match your cooking style, whether it’s rustic or modern. For bathrooms, use waterproof coasters to add elegance next to sinks or on vanity tables.
Where to Find Inspiration for Your Projects
Finding the right inspiration can make your DIY projects shine. By looking at different places, you can find new techniques and designs. Here are some great places to start your crafting journey.
Online Resources and Tutorials
In today’s world, there are many online resources to spark your creativity. Sites like Pinterest and Etsy have lots of ideas, from simple to complex. YouTube has countless tutorials to help you with each step of your projects.
These resources not only give you ideas but also connect you with others who love crafting.
Local Craft Workshops
Local craft workshops are another great way to get inspired. They let you learn new skills and meet people who share your interests. Craft stores often host these workshops, covering everything from basics to special techniques.
Attending these workshops can bring new ideas and give you useful tips for your projects.
Conclusion
Exploring DIY wood coasters is a fun mix of creativity, personal touch, and usefulness. You can show off your style and make special gifts for friends and family. This guide has given you the basics on materials, methods, and designs to try.
Now, you’re ready to start making your own coasters. They can make your home look better or add a personal flair to parties. Homemade coasters will wow your guests and brighten up your space. Each coaster is a chance to show off your creativity and make something unique.
Enjoy making your own wood coasters. It’s a great way to create art that’s both useful and reflects your taste. Start now, try new things, and feel proud of your creations. They’ll not only protect your surfaces but also add warmth and beauty to your home.
FAQ
What materials do I need to make DIY wood coasters?
To make DIY wood coasters, you’ll need wood like pine, oak, or birch. You’ll also need a saw, sandpaper, and wood glue. You can add paint or resin for decoration. Don’t forget a sealant to protect your coasters!
How do I choose the right type of wood for my coasters?
When picking wood, think about how durable and pretty it is. Hardwoods like oak are strong and good with water. Softer woods like pine are easier to work with. Choose wood that fits your style.
Can I add designs to my DIY wood coasters?
Yes! You can make your coasters unique with stenciling, painting, or woodburning. Get creative and make each coaster special!
What techniques should I use for cutting wood for coasters?
Use a miter saw or circular saw for clean cuts. Measure your wood carefully. If you’re new, practice on scrap wood first.
How can I protect my DIY wood coasters from water damage?
To keep your coasters safe, apply a sealant or finish. Polyurethane or food-safe mineral oil works well. They protect against moisture and stains, making your coasters last.
What are some creative ideas for decorating my wood coasters?
Try stenciled designs, resin inlays, or burnt wood for a rustic look. Experiment with paints and stains to bring your ideas to life!
Is making wooden coasters a good DIY project for beginners?
Yes, making wooden coasters is great for beginners! It’s easy, needs just a few materials, and lets you be creative. Plus, you get to make something useful and nice-looking!
How can I incorporate my coasters into home decor?
You can put your coasters on tables or shelves. Use them as part of a table setting. Or, put them in a box or hang them on the wall as art!
What should I consider when hosting a DIY coaster-making party?
Plan ahead and have all your supplies ready. Choose a theme or group project to spark creativity. Offer different decorations and techniques to keep everyone involved!
Where can I find inspiration for my DIY wood coaster projects?
Look for inspiration online, on craft blogs, and social media like Pinterest and Instagram. Also, check out local craft workshops for hands-on learning and community fun!